


When I first delved into JavaScript, the term "local storage" was an unfamiliar one. It wasn't until I had to build a simple personal project that required data storage that I encountered this concept. I made a documentation of what I learnt and I’ve decided to share them with you in this article.
There are various ways to store data within a user's web browser, and some of these methods include:
Cookies: Using Cookies was pretty much the primary means of browser data storage, until recently. They have a maximum of 4kb of data storage, which means larger data can’t be stored all at once. Additionally, cookies were sent to the server with every request, accessible to both client and server sides. However, marking a cookie as HttpOnly prevented client-side scripts from accessing it.
Web SQL: This method mimics relational databases and SQL, allowing data to be stored and retrieved using SQL commands. Unlike cookies, Web SQL can handle larger datasets effectively.
Session Storage and Local Storage: Both of these methods involve storing data in JavaScript. The key distinction is that data in session storage gets wiped out upon page refresh or browser closure, while data in local storage persists even after refreshing the page.
For this article, I’ll be focusing more on “local storage”.
What is Local Storage?
Local storage is a technique to store information within a user's browser. It can store up to 5 MB of user data and can be accessed from any browser or window. Another thing to note is that local storage is domain-specific. In other words, you can only access the data you've saved when you're operating within the domain that houses that data.
For instance, if your website is "mytodos.com" and you've stored tasks like "read my book," "do my assignment," and "go to the market," you can only access these tasks when you visit "mytodos.com."
How Do I Access My Local Storage?
Local storage can be accessed right from your web browser since all stored data are saved across browsers in JavaScript. First, you need to go to your developer tools by pressing F12, then go to the application tab, right there, you will find your local storage (F12 – application - storage – local storage – YourprojectPath ).

Data is stored using named key/value pairs. When you store data, you assign it a key, and later, you retrieve that data using the same key.
To use local storage in Js, there are methods you need to get familiar with;
setItem()
getItem( )
remove( )
clear( )
setItem( ): This method is used to save key/value pairs in local storage. The setItem method looks like the one we have below.
localStorage.setItem("name", "Tomi");
In this example, "name" serves as the key, and "Tomi" is the associated value. This key ("name") enables us to retrieve the corresponding value ("Tomi") later using the getItem() method.
Fetching Stored Data with getItem()
const user = localStorage.getItem("name");

//Tomi
getItem( ) is used to retrieve the value associated with the specified key ("name").
It's crucial to remember that local storage can only store strings. If objects or arrays are stored directly, they appear as "[object object]" in the console. To resolve this, use JSON.stringify() and JSON.parse() to convert them to strings and back into objects, respectively.
Looking at the example below, getItem() retrieves the value associated with the specified key ("name").
const user = {
  Name: "Tomi",
 Hobby: "coding",
};
localStorage.setItem("users", user);
console.log(localStorage.getItem("users", user));
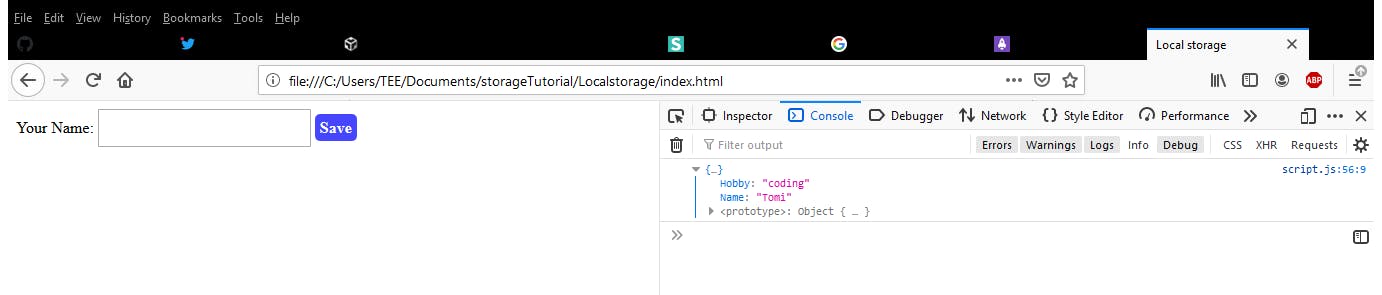
Now, when we check this in our console, we get something like this [object object]

This isn’t so useful because the real object information we need is not included. To fix this, this object has to be converted first to a string using the JSON.stringify( ) method and converted back to an object using the JSON.parse( ) method.
const user = {
  Name: "Tomi",
  Hobby: "coding",
};
localStorage.setItem("users", JSON.stringify(user));
console.log(JSON.parse(localStorage.getItem("users", user)));
Running this code, we get this in our console;
JSON.stringify( ) here has successfully converted this object into a string and we’re able to parse it back into the local storage using JSON.parse( ).
Removing Data with removeItem()
The removeItem() method eliminates the value linked to a particular key:
Now, let’s try to remove the value we got earlier;
localStorage.removeItem("users");
If we try to get this value back using getItem(), we get //Null as the result.
const user = localStorage.getItem("users");

//Null
Clearing All Data with clear()
The clear() method wipes out all data stored in local storage using localstorage.clear( ) method. This can be a little tricky. For safekeeping, consider copying and saving your code elsewhere before calling localStorage.clear(). Then, you can restore your code after refreshing the browser.
Putting It All Together
To deepen your understanding, let's build a simple input page that stores user names in local storage even after a browser refresh. Let's start with the HTML and CSS components:
<!DOCTYPE html>
 <html lang="en">
   <head>
     <meta charset="UTF-8" />
     <meta name="viewport" content="width=device-width, initial-scale=1.0" />
     <title>Local storage</title>
   </head>
   <body>
     <label for="name">Your Name:</label>
    <input id="nameTag" type="text" />
    <a href="#" class="save-btn">Save</a>

    <div class="display">
      <p></p>
    </div>

    <script src="./script.js"></script>
  </body>
</html>
And our index.css looks like this, nothing serious, just some paddings and colours.
body {
   display: flex;
   align-items: center;
   justify-content: center;
   margin: 200px;
 }
 .save-btn,
 .click-btn {
   color: white;
  background-color: rgba(0, 0, 255, 0.726);
  font-weight: bold;
  padding: 10px 10px;
  text-decoration: none;
  border-radius: 5px;
  margin: 0 5px;
}
input[type="text"] {
  padding: 10px 10px;
  width: 30%;
}
.display {
  font-weight: bold;
  background-color: pink;
}
Moving on to JavaScript, initialize your variables:
const inputTag = document.getElementById("nameTag");
const saveButton = document.querySelector(".save-btn");
const Display = document.querySelector(".display");
Now that our variables have been defined, we can make the button clickable with an event listener:
saveButton.addEventListener("click", saveBtn);
Since our saveBtn doesn't exist yet, we have to define the function to save data:
function saveBtn(event) {
  event.preventDefault();
  const displayName = document.createElement("p");
  displayName.classList.add("showName");
  displayName.innerText = inputTag.value;
  Display.appendChild(displayName);
}
saveBtn();
What we’ve successfully done here is that we created another element within our HTML using createElement, added a new class and then called our HTML input value using inputTag.value and finally appended this value to the display div. Now that we can display our input value, the next step is to save this input value in our browser's local storage.
To achieve this, the first thing to do is call the DOMContentLoaded event.
document.addEventListener("DOMContentLoaded", showSavedResult);
This event runs when all the page’s DOM content has been loaded and parsed. Its target doesn’t include external resources like styles, images and so on, it sees the styles and images but doesn’t wait for them to completely load. So, this is the exact event that holds our local storage function, so it doesn’t get cleared even after the browser has been reloaded. Let’s move on to define our ‘showSavedResult’ function;
function showSavedResult() {
   let results;
   if (localStorage.getItem("results") === null) {
     results = [];
   } else {
     results = JSON.parse(localStorage.getItem("results"));
   }
   results.push(inputTag.value);
   localStorage.setItem("results", JSON.stringify(results));
}
What this code does is, it checks first if we already have an array stored in the local storage, if we don’t, it creates an empty array ( results = [ ]; ) and if we already have an array, we parse back our array and push our values into this empty array. We then set it back to a string using the setItem( ) and JSON.stringify( ) method. For this code to run successfully, we have to call our saveName function inside the main function.
function saveBtn(event){
    event.preventDefault();
   …
 showSavedResult();
}
By now, we should be seeing our arrays in the local storage, and we’ll also notice that our data doesn’t get cleared in the local storage if we try to refresh our browser.
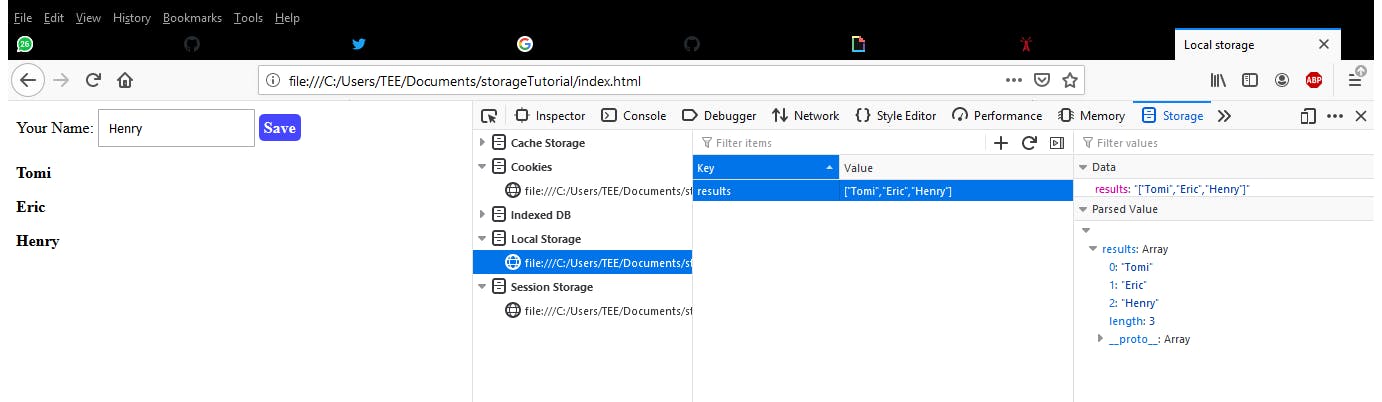
Yes, we have successfully stored our small data in our local storage.
Conclusion
Local storage is not limited to what I’ve written above, but I hope it’s able to give you the basic understanding you need to make use of local storage. With the lesson, we should be able to set an item to the local storage, get back our item, remove our item and also get to clear all data present in the local storage. Feel free to leave a comment or share if this post was helpful to you.